Outlook and Office365 OAuth in cypht
Welcome to the documentation allowing you to enable Outlook and Office365 authentication in cypht.
1. Go to the Azure portal
- Go to Azure portal
- Sign in with your Outlook Account (the one associated with your app).
2. Create or select a application
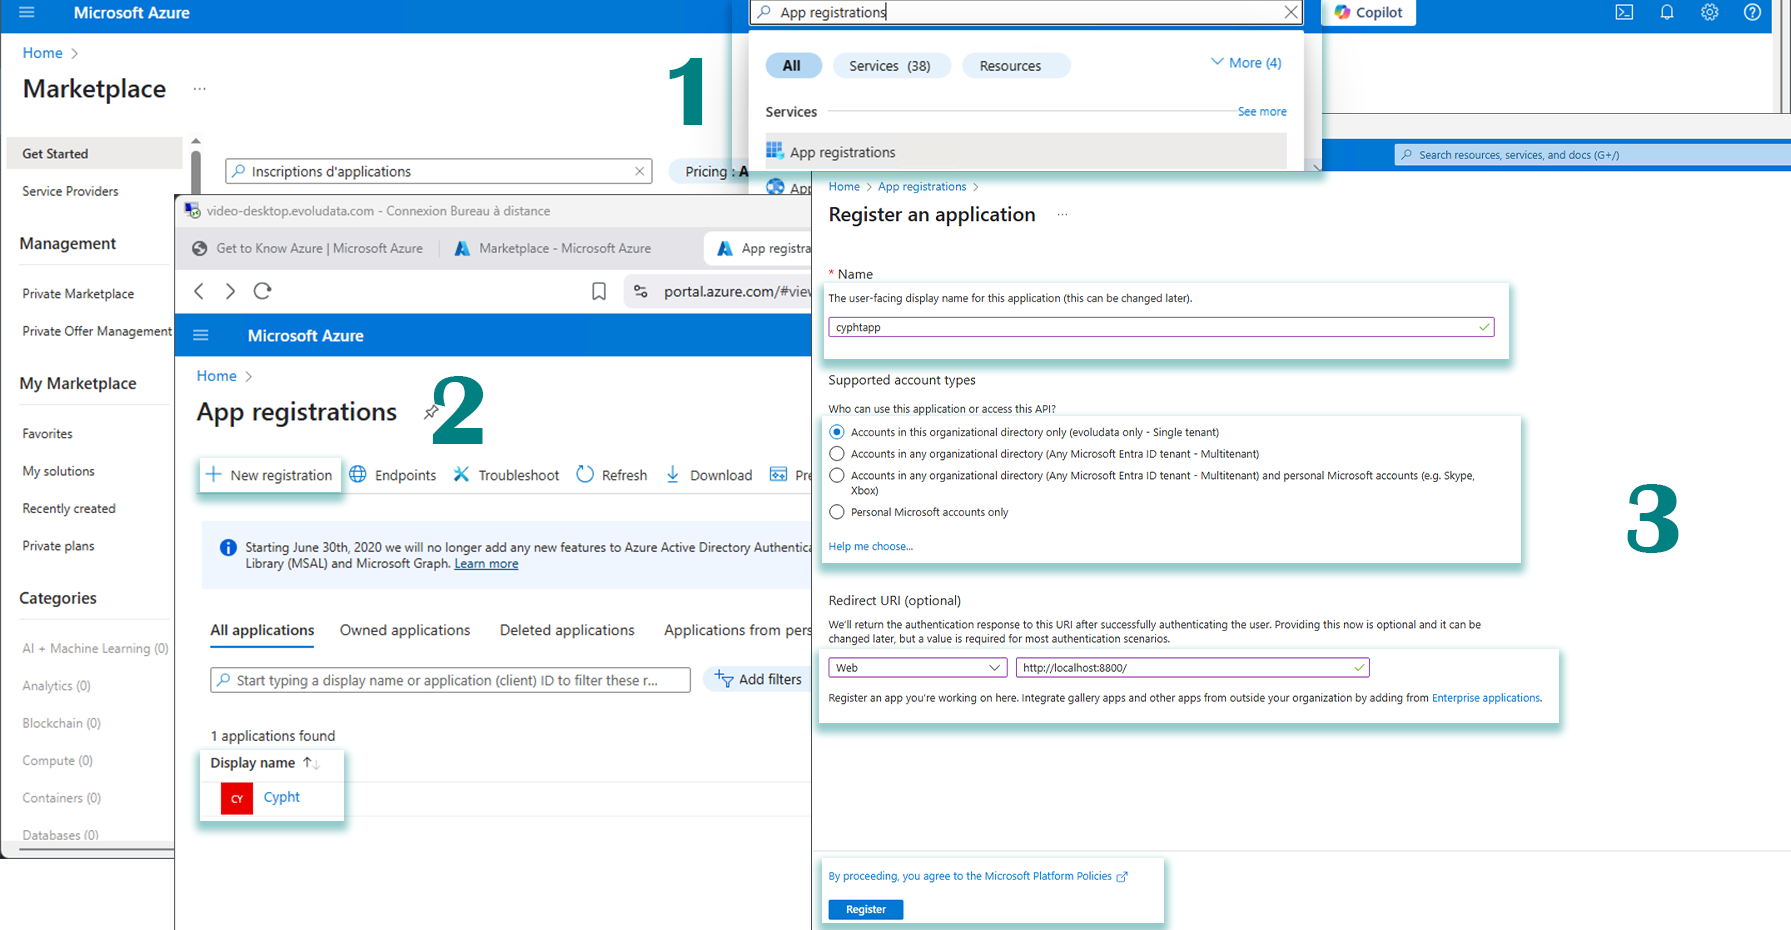
- In the search bar at the top of the portal, type "Application registrations" and select the corresponding service.
- If you already have a application, select it from the list.
-
If you don't have a application yet, click on "+ New registration" and give it a name:
Give a name to your application and configure the account type support options and redirect URIs if necessary, then click on 'Register'.
3. Get the client ID (application ID):
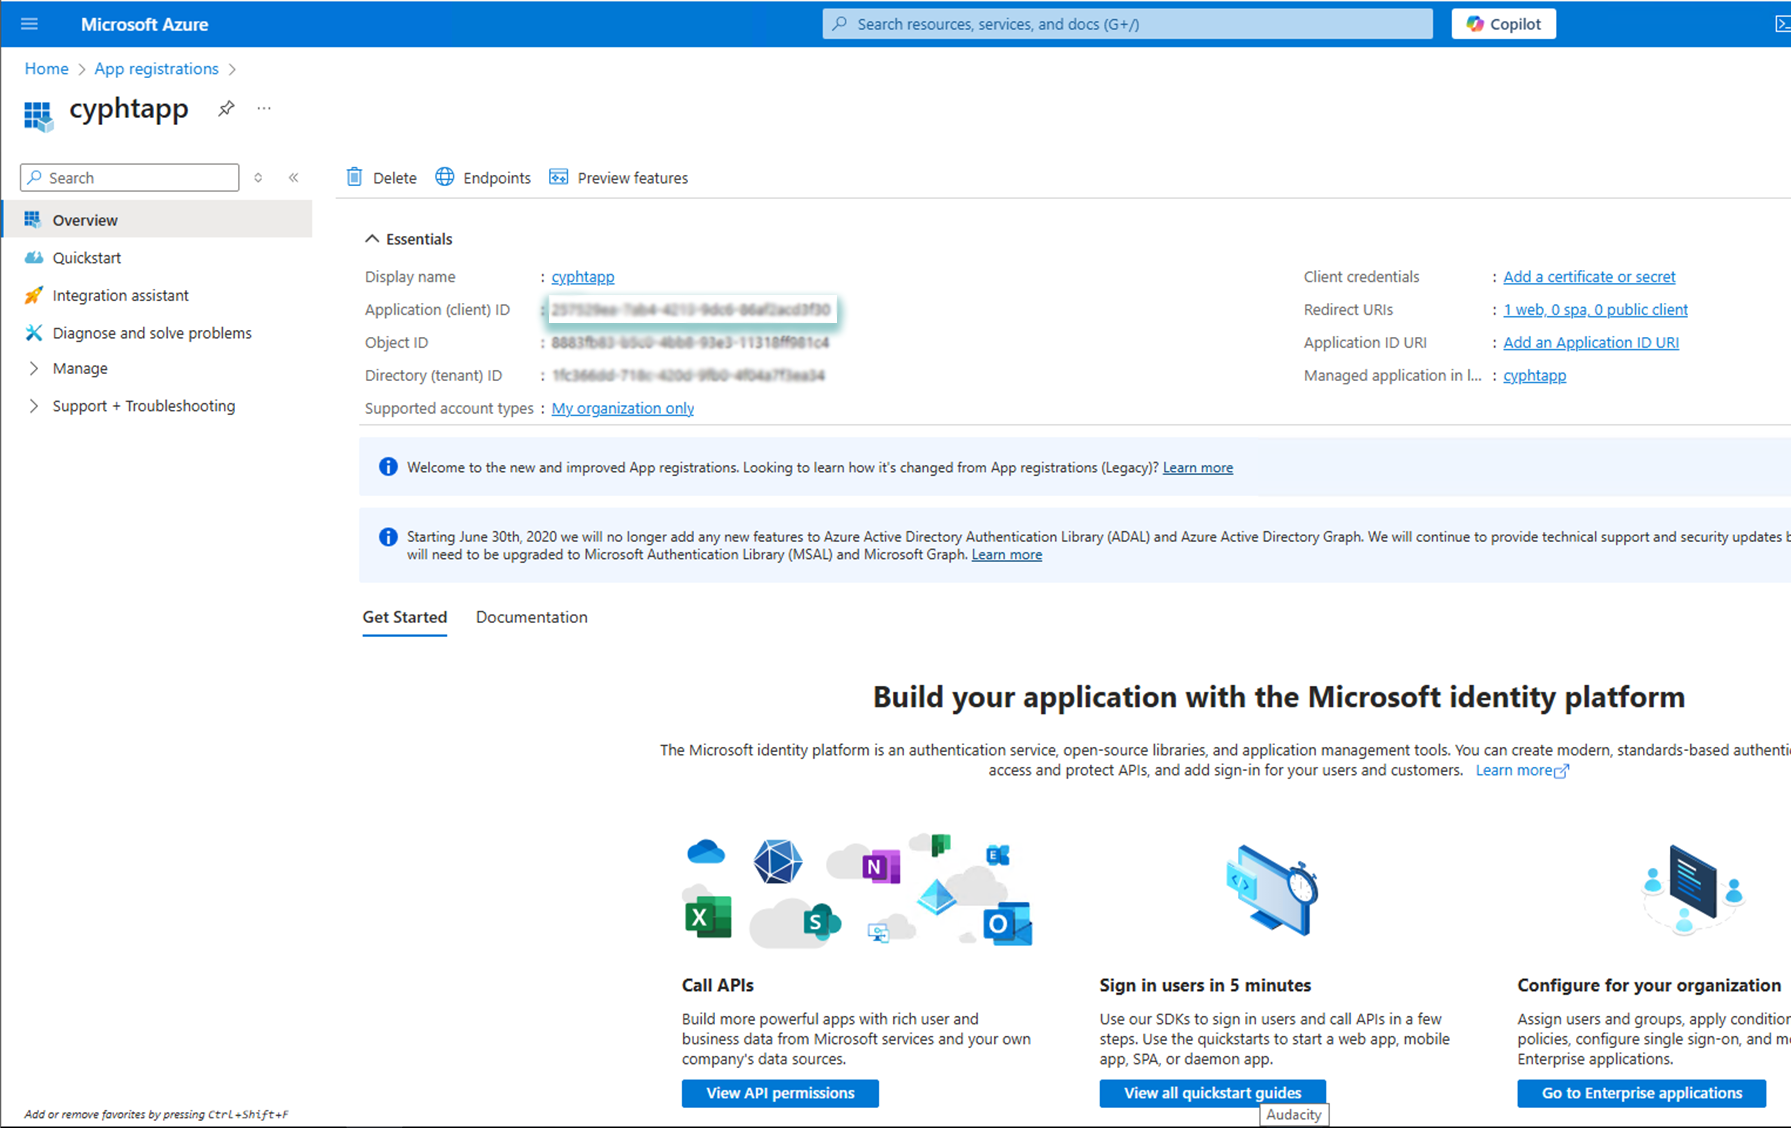
- Once the application is registered or selected, you will be redirected to the application's 'Overview' page.
- The application (client) ID is displayed on this page. It is your client ID. Note it down.
4. Create the client secret key
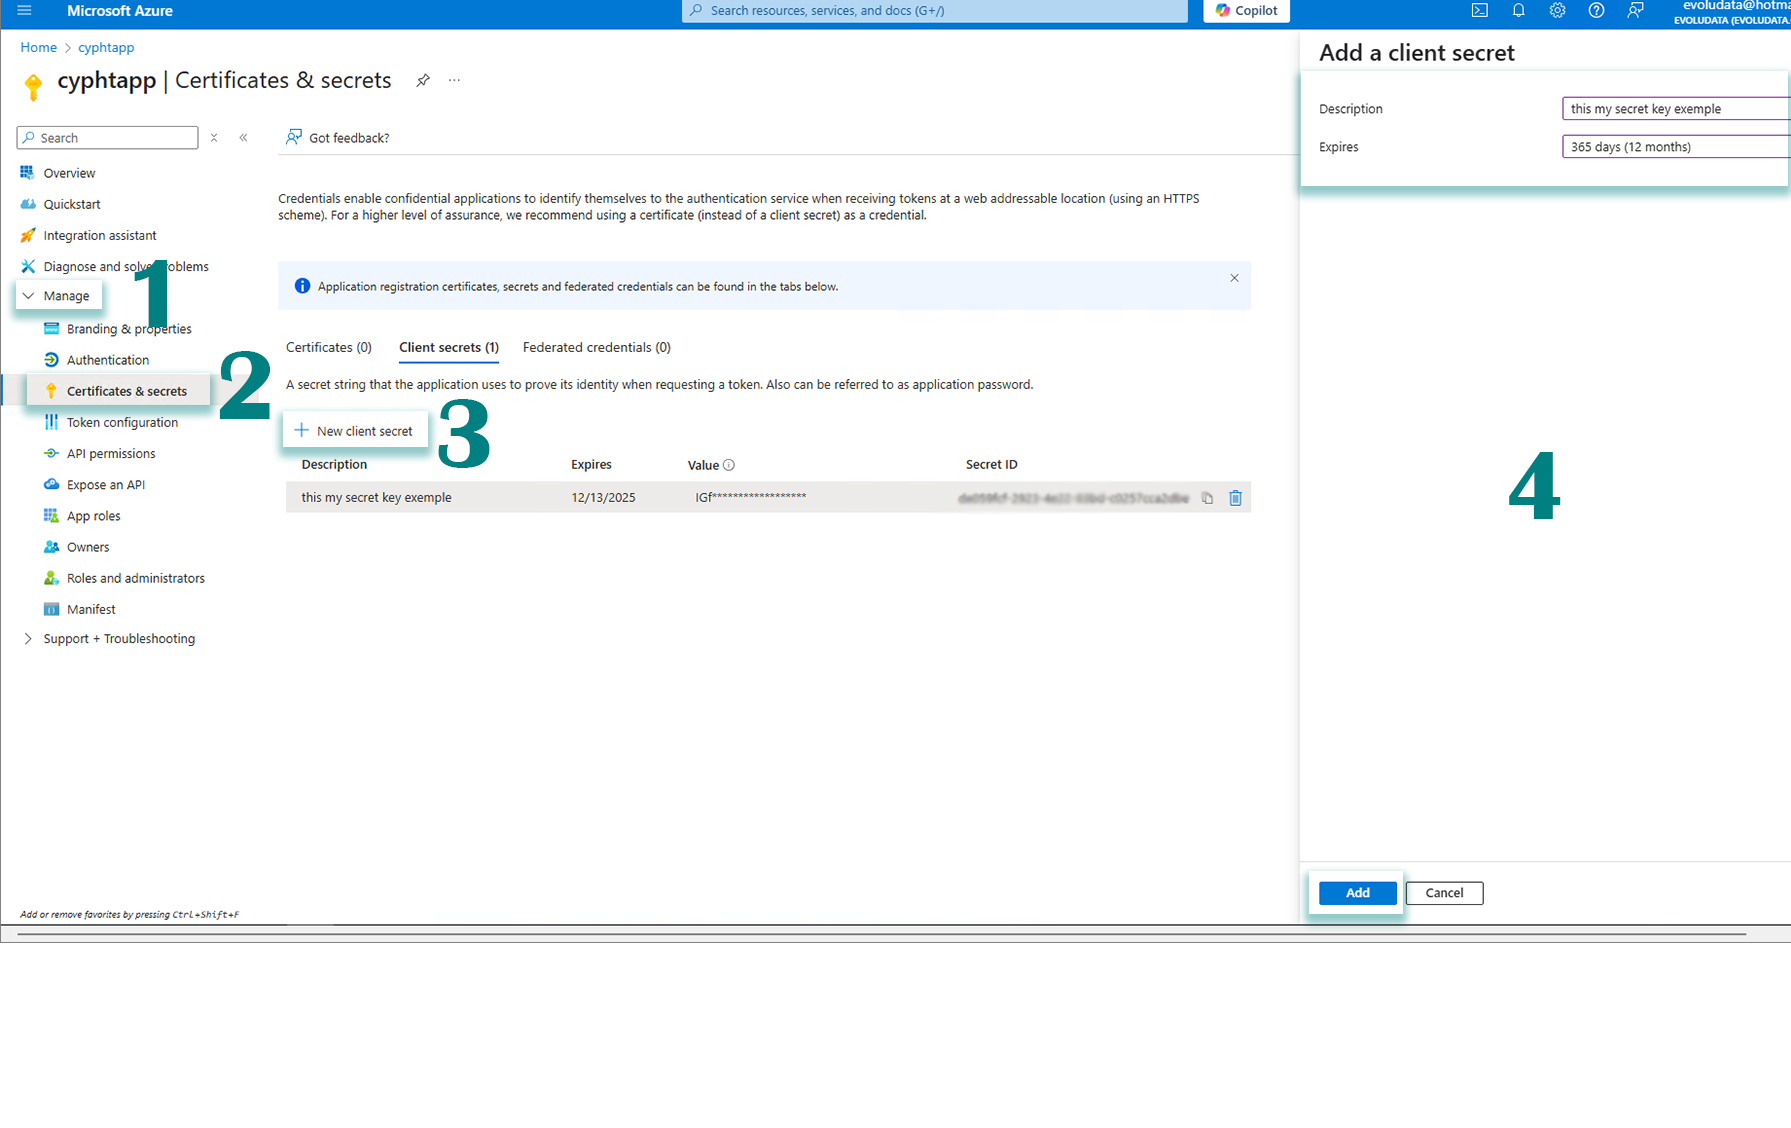
- In the left menu of your application page, under 'Manage', select 'Certificates & secrets'.
- Under the 'Client secrets' section, click on '+ New client secret.'
- Add a description for your secret and choose a validity period (for example, 1 year, 2 years, or 'Never' - although 'Never' is not recommended for security reasons).
- Click on "Add."
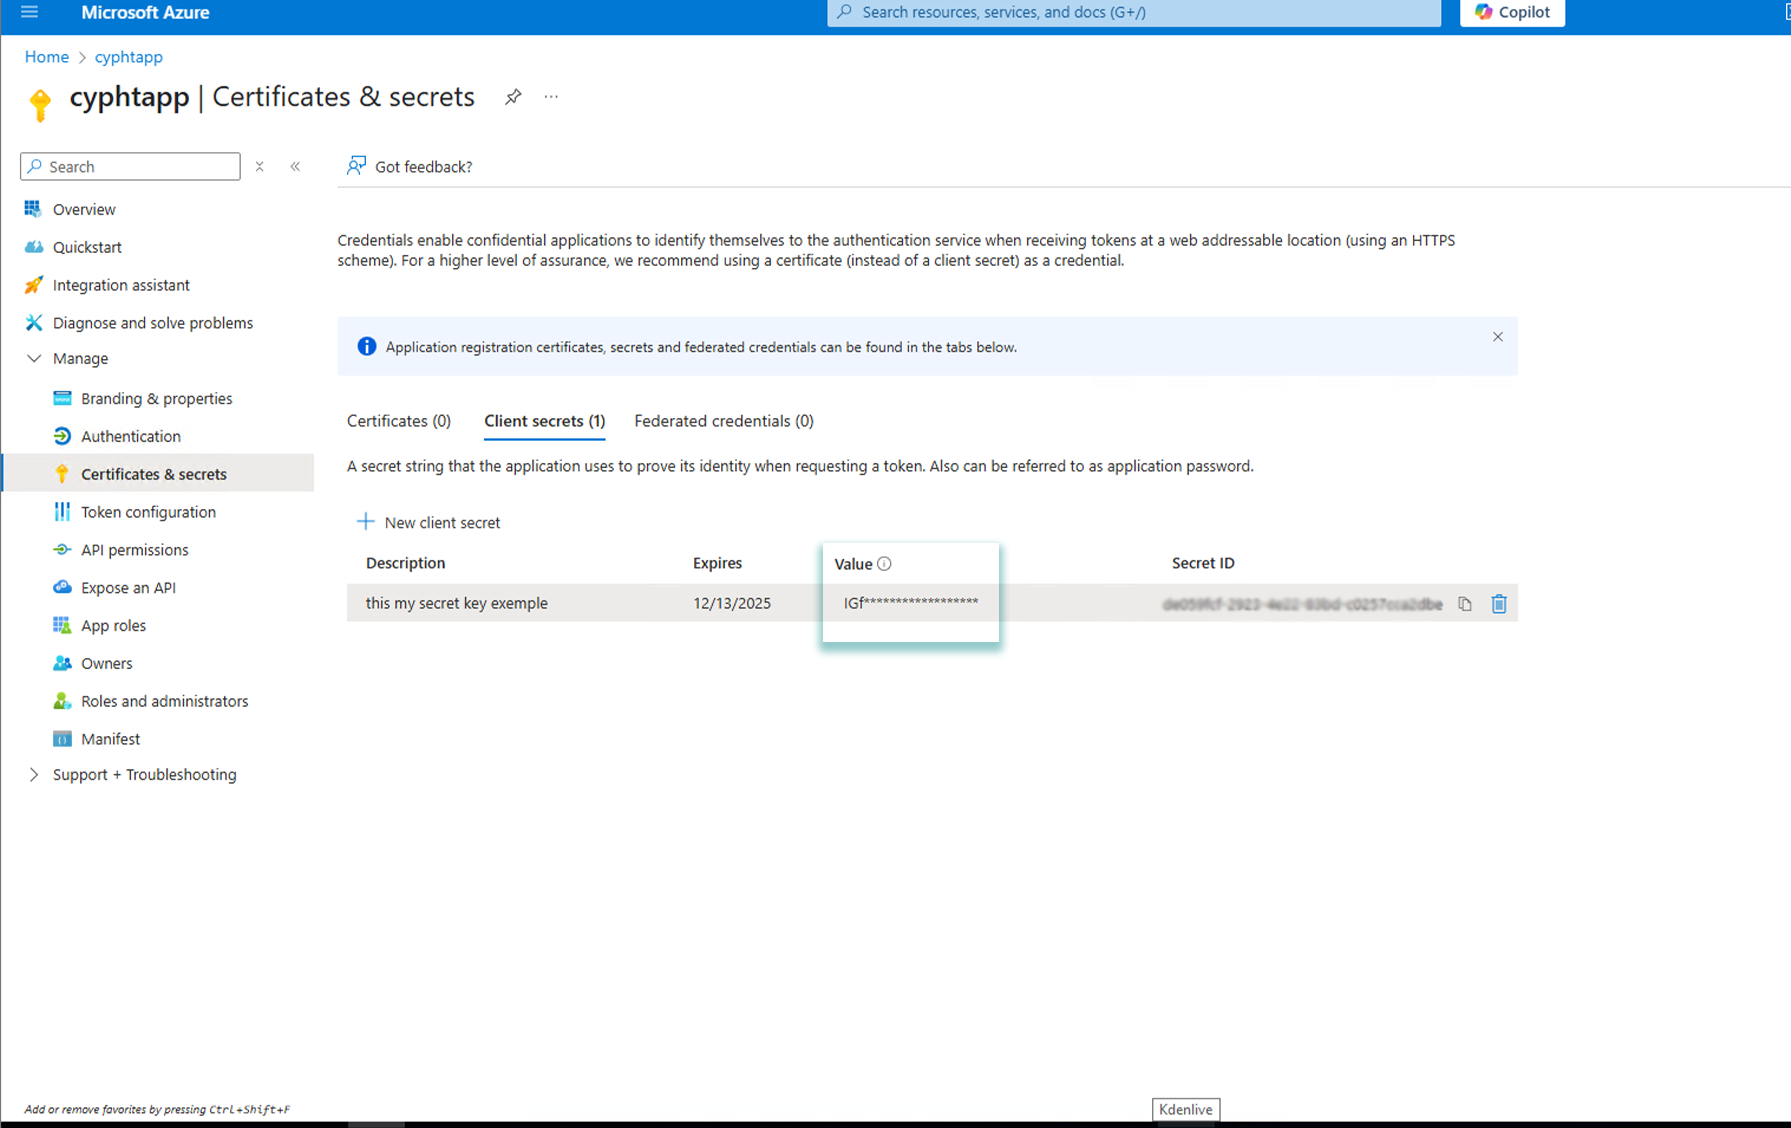
5. Copy the value of the client secret key
Once the secret key is created, its value is displayed. This is your client secret key.
It is crucial to copy this value immediately, as it will no longer be visible after leaving this page. If you do not copy it, you will need to generate a new secret key later.
- ID client(1) (OUTLOOK_CLIENT_ID or OFFICE365_CLIENT_ID). get here
- Client secret (2)(OUTLOOK_CLIENT_SECRET or OFFICE365_CLIENT_SECRET).
Once you already have your credentials, go to the ".env" file at the root of the cypht project, then look for "OUTLOOK_CLIENT_ID or OFFICE365_CLIENT_ID" where you will put the number 1 and "OUTLOOK_CLIENT_SECRET or OFFICE365_CLIENT_SECRET" where you will put the number 2.
Now your configuration is done.